Topics:
Installation- Installing GLD - Windows XP / Vista / Windows 7 / Windows 8 / Windows 10
- Upgrading GLD from a Previous Version
- Updating the Current Version with latest build
- Using GLD with Multiple Users on the Same Machine
- Installing GLD with Limited User Permissions
- Installation Errors - Another Version Already Installed
- Installation Error - Driver Incompatible with OS
- Installation Errors - Permissions in Windows Vista and Windows 7 (32 bit/64 bit)
- CFD Module Installations
HASP Keys
- HASP SRM (Hardware Key) Errors
- HASP Key Installation Errors
- My GLD Launches in Trial Mode
- Network License Exceeded Error
- After W10 Update, GLD opens in trial mode
- False Virus Scan Alerts (from AVG, McAfee, Symantec or others)
- Update your HASP key license for new GLD version
- Identify the proper HASP Key
Operation
- Can I run multiple versions of GLD?
- Can I Run My GLD Remotely or Virtualized?
- I can't find my project files. I can see them in GLD but not in Windows Explorer.
- My software worked well in XP but Windows 7 has strange issues.
- Setting correct permissions in Windows 8.x and Windows 10
- Iteration errors
- Vista issues
- GLD "75Path Errors" or other "Path Error"
- Standard GLD Work File Locations
- ASHRAE Report files from the GSA Module
- Grayed out variables
- Grayed out results
- EWT's and total capacity appear as negative values
- .GT2, .GT3, .GT4 Files
- APS File Export
- IDF File Export (G-Function Data)
- Sample Reports from GLD
- Loads Files Requirements
- Simulation of Large Loopfields
Theory
- Modeling period for horizontal systems
- Regional Temperature Swings for Horizontal Models
- Calculation Methods
Residential Version - Specific Items
- Activating LEAD+ Licensed
- LEADPlus Hardware and Software Requirements
- LEAD+ Application won't Launch
- Microsoft Excel Requirements
- Using Manual J Loads Information
The GLD Installation Process
Good news! Beginning with GLD2016, it is no longer necessary to uninstall the program to load a new update! The GLD software is digitally signed and will operate on all "modern" versions of Windows, including Windows 10. GLD2016 has been tested to work with
- Windows XP (SP3)
- Windows Vista (32b or 64b versions)
- Windows 7 (32b or 64b versions)
- Windows 8.x Professional (32b or 64b versions) NOT RT!
- Windows 10 Professional (32b or 64b versions)
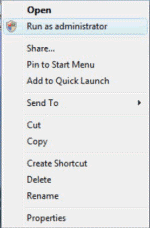
Step 1: Run the setup program. In some environments or versions of Windows, security settings may require you to run as administrator for installation. Right click the executable program to display this choice.
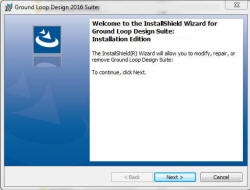
Step 2: You will see the following screens:
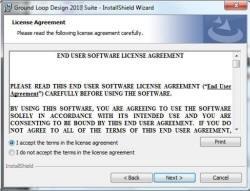
Read and accept the software end user license agreement. This is a
legal agreement.
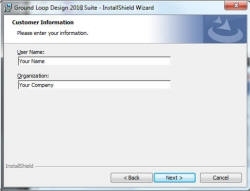
Enter the user name and company information that you would like GLD to use.
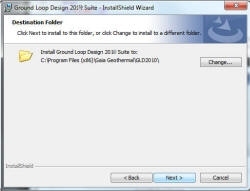
Accept the default program destination. You may change the location if
needed, but we recommend using the default for ease of future operations.
Note that the working file folders for GLD2016 are located in different
locations than previous versions.
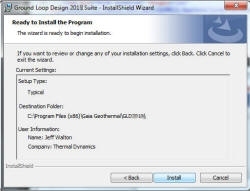
Check and install the program using the displayed information. You may
go back and correct any items that need to be changed.
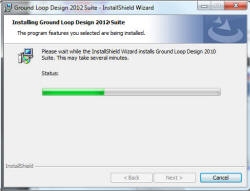
The setup process is underway. Several screens resembling this will
display your progress.
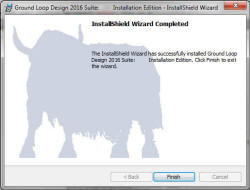
When the initial setup is completed, this screen will be presented.
Uncheck the Launch program box if you are installing the full (non-trial)
version.
Plug in your USB hardware key. The device drivers for the key will
load automatically. This may take a few minutes as the internet is
checked for updates. If you expand the applet in the lower right tray
area, a progress box similar to below will be displayed. If you do not
wait for this process to complete, GLD will only launch in the trial mode.
Note that GLD2016 is the only version that will load seamlessly with Windows
8.x and Windows 10.
Earlier versions of GLD are not fully compatible with Windows 8.x and Windows 10 requirements.

The red light will illuminate on your hardware key and when all three
drivers have updated the program is ready to operate! A splash screen on GLD launch will present the
version information to show the successful installation of the software and
key drivers.

Upgrading from Previous Versions (i.e.: 3.x, 4.x, 5.x, 2009, 2010, 2012, 2014):
Q. I want to upgrade from a previous version to GLD2016. How do I do this and will I be able to continue to use my previous version?
A. Upgrading is an easy process from any previous version.
If you have loads data or project files, you should consider
copying the data to the new file folders after the installation of the
new version is complete. Note that the
locations
for folders have changed for GLD2016 to comply with security requirements of
the newer Microsoft OS. Your project and loads files are
backwards compatible with GLD2016 but may require opening and resaving
to store the new file location information.
While the upgrade process should not disturb files that were not included in the
previous installation process, it is always a good idea to preserve a
backup of important data. Please note that customized heat pumps
from previous versions of GLD will NOT be available in the GLD2016 installation as a completely new
updated pump file library is provided.
Since GLD uses a key licensing system, the key profile is programmed
specifically to your installation of the current product. In
general, you will be unable to use your previous version sfter the
license key is updated. The HASP key contains the complete program license
and will be programmed to recognize only the current
version and features. A previous version may still be installed on your system
but it will revert to a trial mode of operation.
Updating your license key to the current version is a straight forward process.
After you download and install the program, please follow these instructions
for updating your license key:
-
1) Attach your current license key to the computer USB Port.
-
Back to top
2) Navigate to C:/Program Files/Gaia Geothermal/GLD20xx/Extras
Note: /Program Files (x86)/ in Vista, W7, W8.x and W10 64b versions
3) Run the GLDLicenseUpdater.exe that is found in the folder. Collect the key information, save the yourcompanyname.c2v file and then email it to us at: sales@groundloopdesign.com.
4) We will respond promptly with the key activation code and instructions.
Updating the Current Version of GLD with the Latest Build
Q. I got a notice or see that my version of GLD has an update available. How do I update?
A. GLD will have interim builds of the program that will be available free of charge to users with the latest GLD software family (GLD2016). To check if your GLD is the latest build, please use the menu pulldown for: (help --> about) to read the build number. It will look like this:


The screenshot above is for illustration only. If your "Version" (or build number) is different from our current build number, please download the latest version from our site.
Beginning with GLD2016, there is no need to do anything other than to execute the update file to load the latest software updates.
For versions of GLD2014 and earlier, you will need to uninstall your current GLD from the Windows Control Panel. Look for "Add/Remove Programs" or "Programs and Features" in your version of Windows. This process will retain all of your projects and work EXCEPT for any custom heat pumps that you may have created. You will need to save the pumps folder before uninstalling. After uninstalling, please run the new installer and accept the defaults to keep the program in the exact same folders location. See the installation process above if you have any questions regaring installation.
Using GLD with Multiple Users on the Same Machine
Q. We want to have multiple users for GLD use the same PC. Is there anything special that we need to do?
A. GLD2016 introduces the ability for multiple users to have
their own libraries and configurations for saving projects to their own
folders. The new GLD installer will create a separate file
structure for each user in their "My Documents" folder and is
essentially duplicated for each user in their respective "My Documents"
folder. This allows for each user to retain their own projects,
logos, and simulations. The only items that remain common to all
users are the Help file documents and the Heat Pump library.
For GLD2014 and earlier, there is just a single folder structure that
all users share. All users share the same configuration and files.
Installing GLD2016 with Limited User Permissions
Q. When installing GLD2016, I am challenged for a system administrator password. Is this normal? Will I see this each time GLD is opened?
A. GLD2016 installation by a "Standard" Windows user will
always be challenged for a system administrator login. This is
because a "Standard" user in Windows or a custom user in a corporate
environment often does not have sufficient permissions to install new
programs. This is purely a security issue related to Windows and allows companies and
users to control the installation of software in their particular
environment. The installation challenge will only appear on the
initial installation.
A "Standard" user can install GLD2016 without further intervention once
the system administrator or local user with admin privledges provides
the sign-in during the installation. The software will be
installed and configured for the user that started the installation.
When there is more than one user on the same machine, for each time a
new or different user opens GLD while they are logged in, a dialog box
will appear for 5-10 seconds as GLD sets the configuration for that
particular user. The dialog box will look something like this:
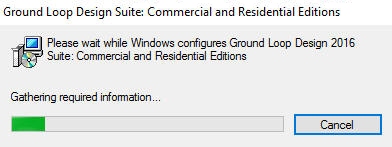
After initial setup, this dialog box will only appear if a different user has opened GLD. This does NOT require any additional credentials or administrative intervention.
Installation Errors
Q. On installation, I receive a message that says I have
another version installed and setup cannot continue. You receive a
message similar to the below dialog box:
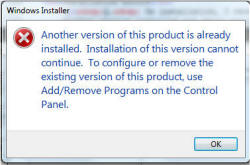
A. Users of GLD2016 will not see this message as the installer has been updated.
You are using an older version of GLD (GLD2014 and earlier) and have previously installed GLD or have an earlier revision or trial version of the software. The installer package is a full installation, not an upgrade.
- In the control panel of Windows, remove the previous version.
IMPORTANT! Take care to save your proprietary work from any folders that
reside in the folder hierarchy under the Gaia Geothermal folder.
Copy to a safe location so that the uninstall process does not
accidentally delete
your data. Normally, files and folders that contain user created
data will not be touched.
- After uninstalling the previous version, remove your USB hardware key and execute the GLD setup program. It is generally not necessary to "run as administrator" but this can be done if there are any additional installation issues. See previous topic (above)
Installation errors with
newer versions of Windows
Vista, Windows 7, 8 or 10 (32 bit and 64 bit)
Q. I receive an error telling me I need to be the administrator to install the software?
A. Security has gotten more restrictive due to malicious
activities that affect the corporate workplace IT environment.
Beginning with GLD2016, we have relocated files and folders into
locations which are safer for our users but some workplace security
still require extra measures.
Download and save the software from our website to your
computer. While most users will not find this extra step
necessary, some workstations are running tightened security. Right-click on
the installation file and select run as
administrator. This step applies to all versions of Windows Vista
and above. The security is tightened on the newest versions of Microsoft OS. Files should install after these steps have been
taken.
I can see my projects in GLD (2014 and Earlier) but can't find them in Windows Explorer. (Issues that happen with W7 / W8 / W10 but didn't happen in XP)
Q. After saving a file in GLD, I want to send a copy of my project to someone but I can't seem to find the file when I look under the GLD Program folder. I can see the files in GLD and they have a little padlock on the icon.
NOTE: This FAQ applies to users of GLD2014 and earlier. GLD2016 uses a different folder structure and is NOT affected by Windows file virtualization.
A. APPLIES ONLY TO GLD2014 AND EARLIER
Users of Windows 7, 8 & 10 have reported that their files are missing. Actually, the files are not missing but are being stored in a different location. Due to security issues that were introduced in Windows 7 (file virtualization), some programs try to write files to locations that are blocked by the UAC (user account control) Windows 7 OS. This is not a problem specific to GLD software and is a function of Windows 7, 8 and 10 security. Users with standard rights, particularly in the Home version of Windows use "virtual folders" that are specific to each user, so it is likely that your project files have been stored in your "virtual folder". Read further if you want to know the specifics.
Depending on your computer security settings, W7, W8 and W10 may also try to prevent GLD from writing to its own folders and this will cause strange behaviors with a lot of technical software. For a quick solution, take ownership of the folders. GLD2014 has a built-in fix to allow the user to take ownership.
Here is an example of how to find the "missing files":
You saved a finance project in GLD. You expect it to show up
in the folders under GLD:
- C:\Program Files (x86)\Gaia Geothermal\GLD2014\Finance\(filename.fin)
When you look in Windows File Explorer, it is not there, yet you can open it in GLD. Check here:
- C:\Users\(Your user ID)\AppData\Local\VirtualStore\Program Files (x86)\Gaia Geothermal\GLD2014\Finance\(filename.fin)
Note; Standard level installation of Windows may hide the virtualized folders. You may have to unhide these folders in Windows.
This can apply to other types of projects in GLD, such as Vertical or Horizontal projects; zone files; imported loads files and others. The user security settings and version of Window are the controlling issue and you can seek further assistance from your IT staff to make changes to stop this from happening. Otherwise, if your work data files are missing from under the GLD program folders, you can find them in the "virtual store" heirarchy that Windows has created. There is no need to move them as GLD can see them in either location.
There are other useability issues that this can cause so we recommend that you perform the "take ownership" operation.
Changing virtualization behavior by Windows 7:
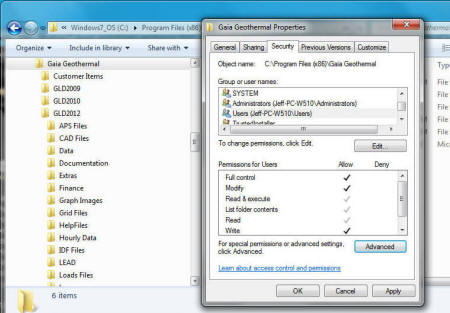
1: Take ownership of the Gaia Geothermal folder tree and
2: Assign full rights to the user or group.
You will need to have administrative rights to make this change and your
IT department can help. This is the least intrusive fix
available. The folder permissions should be set to full control for
the user, as shown below. If you make this change, you can move your
files back into their folders within GLD. Making this change will not
affect security in any other ares of your system and is the safest way to
change the Windows behavior for GLD. This fix will also work for other
programs having similar issues.

The Easy way to Take File/Folder Ownership
 |
Want a convenient tool to allow this operation from within Windows File
Explorer? GLD2014 automatically installs the tool into
Windows File Explorer to take ownership. If you are using an
earlier version of GLD, you will need to download this
registry tweak (for Windows
7, Windows 8 and Windows 10) ) and run
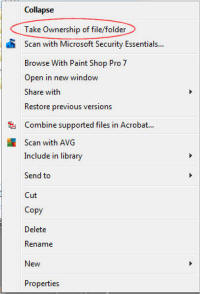
on your system. (The registry file is zipped for download security) It adds the "Take
Ownership of file/folder" option to the context
menu (right click) for any file or folder. (File courtesy of PC
Magazine) When you apply the take ownership option, a box will open
and show the different files being processed and is the expected behavior.
The screenshot to the left is a look at a typical context menu with the "Take Ownership"
command added. When using with GLD, please apply to the "Gaia Geothermal" folder that is installed into: C:\Program Files (x86)\Gaia Geothermal This will change the ownership of both the files and folders that are part of the Gaia Geothermal tree structure. This will allow GLD to manage and use its own folders. If you want to remove the menu item from your system, download this registry tweak which will remove the menu option. Note: It does not undo any folder or file permissions for which you have taken ownership. |
HASP SRM (Hardware Key) Errors
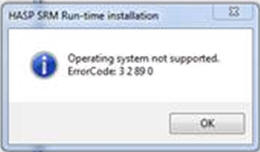
Q. On installation, I encounter: "HASP SRM Error: Operating System Not Supported"
A. The USB hardware key uses drivers from the key
manufacturer (Gemalto/SafeNet) to communicate with your computer OS. In most cases,
the correct drivers will be installed but when this error is
encountered, you may manually install the file.
You may encounter this dialog box:
 |
For older versions of GLD (2009, 2010) the installer uses an older version of the HASP drivers. Windows Vista and Windows 7 updates have been know to generate the error message and the workaround is to install a current driver first so that the GLD Installer will skip the HASP driver when it discovers a newer driver is already installed. |
For GLD2009 - GLD2012: Vista, W7, W8 Users:
For convenience, we have provided a direct link to the HASP run time installer and it can be downloaded here.
For GLD2014 - GLD2016: W7, W8 and W10 Users:
For convenience, we have provided a direct link to the appropriate HASP run time installer and it can be downloaded here.
Alternately, for the a specific Gemalto/SafeNet driver, you could visit their site at http://www3.safenet-inc.com/support/hasp.aspx and download their latest driver set.
In the event that you need to completely remove the HASP drivers and are having difficulties, SafeNet has an uninstaller that will remove registry and file fragments of the HASP Driver. For your convenience, a direct link to download is here.
After loading the HASP driver, run the GLD Installation again and it should now
complete correctly.
If you are using a network version of GLD, please refer to our Network HASP Key information
After W10 Update, GLD Opens in Trial Mode
Q. GLD worked fine before the last W10 update and the key is lit but now opens in trial mode.
A. Windows 10 updates are often major installations that
actually are loading an entire OS to replace your previous version of
Windows 10. Generally, the process shouldn't disturb your existing
programs but we have had instances where the license manager doesn't get
registered or setting are changed in Windows. Your key will
usually still be lit but that does not mean the license manager is
running. We have two solutions:
1: Reinstall GLD. Download the software from our site to
make sure that you have the latest build. No need to uninstall
anything, just reinstall.
2: If the first step does not cure the issue, install the separate
license manager for the license key. This will show as a new program in
the Control Panel>Progrems and Features and uses a more robust installer
than GLD to force the installation of the license manager needed to
operate GLD.
For GLD2014 - GLD2016:
For convenience, we have provided a direct link to the HASP run time installer and it can be downloaded here.
Alternately, you can visit the Gemalto/SafeNet site
http://www3.safenet-inc.com/support/hasp.aspx and choose the download
for their latest
driver set.
If you are using a network version of GLD, please refer to our Network HASP Key information
HASP Key Installation Errors
Q. On installation, everything works up to the installation of the HASP drivers. The installation fails and is rolled back to the original state.
A. You may already have HASP drivers installed from a previous key installation or for another product that uses a HASP key. It will be necessary to remove the previous HASP drivers. GLD will install new drivers that should also work for other products that use the HASP keys from SafeNet. If other products that use the HASP drivers need to be updated after installation, please run the Gemalto/SafeNet installer below, AFTER installing GLD.
For GLD2009 - GLD2012: Vista, W7, W8 Users:
For convenience, we have provided a direct link to the appropriate, and tested. HASP run time installer and it can be downloaded here.
For GLD2014 - GLD2016: W7, W8 and W10 Users:
For convenience, we have provided a direct link to the HASP run time installer and it can be downloaded here.
Alternately, you can visit the Gemalto/SafeNet site
http://www3.safenet-inc.com/support/hasp.aspx and choose the download
for their latest
driver set.
If you are using a network version of GLD, please refer to our Network HASP Key information
When Launching the GLD2016 Network Client, an Error Message Appears
Q. When launching the network
version of the GLD2016,
I get a "Network License Limit Exceeded"
Message.
A. This message can be caused by a few different problems:
- The Network Client is being usied with a standalone license key
- There is already a user(s) that have checked out the available
licenses
- The network license key is missing
- The network license key is expired
GLD offers either a standalone version of the software or a network
version. Both versions look very similar when running but require
different physical license keys. If the wrong workstation client is
used with the wrong license key, the software will either jump immediately
to "Trial Mode" or you will get the "Network License Limit Exceeded"
message.
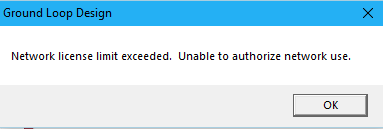
Double check that you have not inadvertently installed the wrong version of the GLD software. An easy way to check is to look in the Control Panel of your PC for Programs and Features and the description will show if the "Network" version of the GLD Design Suite is installed. If the wrong version is installed, simply remove it and install the correct version.
If your workstation cannot see the network license, you will get the "license limit exceeded" message. You can try opening http://localhost:1947 in a browser to see if the license manager can see the key. If it can't, this will require more trouble shooting and generally, once the network license is configured correctly, this message will only show if there are too many users or if the license is expired.
If your network license is expired, the steps above will allow you to use the license manager to see the condition of the license. Here is a screenshot of what you are looking for:
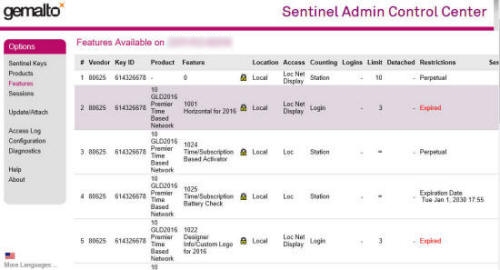
In the above example, this is a (3) seat license and the presence of "Expired" in the restrictions column simply means that the license key must be renewed. This applies for GLD2016 and newer.
GLD Only Launches in Trial Mode
Q. I have my key inserted but the software always opens in
"Trial Mode"

A. There are several possible issues:
1: The key for your installed version must be plugged into your
computer and must be lit. If you install a different version of GLD
and try to use a key that was programmed for a different version of GLD, it
WILL NOT work. The installed version of GLD must match the key.
2: If the key is not lit, the drivers are not installed or the key is not recognized. See the previous FAQ for instructions to load the drivers manually.
3: The key is lit but the software still opens in trial mode. If you are sure that you have the correct key for your version of GLD, you can check to make sure that the correct drivers are loaded by opening a web browser (ie: Chrome; IE; Firefox, etc) and enter this web address: http://localhost:1947 You should be presented with a license management screen that will provide further information about your key. If you get a "page not found" error for this address, your drivers may be corrupted and need to be reinstalled. See the previous FAQ for instructions to re-load the drivers manually.
4: If you are trying to use a standalone GLD key on a network that already has a network key for the network GLD version, the keys will have a conflict. You will need to either disconnect from the network or remove the network key in order to get a standalone installation to work properly. This situation is extremely rare and should only occur if the customer is trying to use software for a GeoCube installation where the full GLD Design Suite is also installed. Please contact us if you have this situation and we can assist.
If you are using a network version of GLD, please refer to our Network HASP Key information
False Virus Scan Alerts
(from AVG or others)
Q. I have a virus scanning program that is identifying "GLDLicenseUpdater.exe" as being infected with a virus. What do I do? Is the program infected?
A. GLD uses a third party licensing system from Gemalto/SafeNet, the makers of the HASP USB key that ships with GLD. The file that is being identified as a threat is the tool that is used to reprogram the firmware in the USB key to activate features of GLD. This file is SAFE to run. We are working with a couple different antivirus companies that are mis-identifying the file as being infected. In the meantime, you should create an exception for the file named "GLDLicenseUpdater.exe". It is typically located in this folder: C:/Program Files (x86)/Gaia Geothermal/GLD20xx/Extras/
Sorry for the inconvenience while we work with the vendors to correct the issue.
Updating your HASP Key (Dongle) for a new version of GLD
Q. I already own GLD and have a HASP key. I want to add features or update my key to a later version of GLD. Do I need to sent the key back for reprogramming?
A. We can program some keys remotely, depending on your software version. If you have GLD2016, GLD Residential or GLD Thermal Conductivity Module, the GLD HASP Key (Dongle) generally does not need to be sent back for programming as we have included utilities to allow the key to be reprogrammed in the field. If you have GLD2014 Professional, Premier or any earlier version, the license key must be exchanged for the latest hardware.
For GLD2016, the licensing system has changed and we need to retrieve license data from the old key prior to issueing a new license key. Customers that are upgrading GLD2009-GLD2014 to the new GLD2016 will need to return the old key as the new key system requires a completely different key. Sorry for the inconvenience.
For instructions on the reprogramming the key after purchasing an upgrade or adding feaures, click here.
Can I have multiple versions of GLD?
Q. I want to run multiple versions of GLD. Is this possible?
A. There is probably no reason to have multiple versions of
GLD since the latest version is backwards-compatible with all of
your previous work. Additionally, the latest version has the
latest heat pump data and calculation theory.
 |
If you want to run a previous version and the current version, it is possible because GLD creates a separate top level folder for each version. The requirement to run multiple versions involves the need for multiple keys. Since we update the license key from previous versions to operate the current version, it is not likely that you will have multiple keys. If you do have multiple keys for different versions, the different versions WILL run. |
If you have not uninstalled the previous version after upgrading, both versions will run, but only the version with a current key will be fully functional. We recommend that after upgrading, removing the previous version is good practice and will help to free up space in your system.
Remote Desktop Operation; Application Virtualization
Q. I want to remotely log into my computer and run GLD but it does't work. What am I doing wrong?
A. As far as GLD is concerned, there is nothing wrong with
using GLD in this manner. Customers have asked about operating GLD
remotely by leaving their PC on when they are out of the office but it
doesn't always work. The reason for this is that the
 HASP key and
associated software recognize some remote clients as an attempt to
defeat the license key restrictions and will present the user with the
trial screen. This behavior is not part of GLD and is due to the
licensing from the SafeNet HASP Key. Specifically, the HASP Key
will NOT allow a utility such as the Microsoft Remote Desktop to operate
the software via another machine because it recognizes that the user is
not on the machine with the key. It may, however, allow other
utilities to operate GLD remotely.
Today, there are numerous web based utilities that are available for everyday use to allow a user to remotely access their desktop and we have found that some seem to work better than others. An example of a utility that is known to work is RealVNC and this has been used by some companies to allow users to remotely work on GLD. There may be other programs that will also work and it IS NOT the intention of the GLD Software to prevent you from doing this. The SafeNet HASP Key drivers are regularly updated via Windows update services and GLD does not control the security nuances of how the HASP key views these remote utilities. This means that customers with GLD software are welcome to use the software via a remote client but it is not something for which we are able to directly provide support.
Q. I want to virtualize my installation of GLD but it doesn't work. What am I doing wrong?
A. The same general conversation regarding remote use and licensing of GLD is true of application virtualizing software. GLD does not support any virtualization software platforms and the HASP key and license manager will generally not allow the software operation to be distributed to another machine. The general rule of thumb is that GLD will only be available to a workstation with the software installed locally and the key installed in the same workstation. Customers that want to make GLD available on multiple machines without moving a key from station to station should consider the GLD Network version, which broadcasts the license but still requires client-side software installation.
GLD "75 or 76 Path Error" or other Path Errors
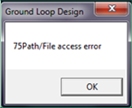
Q. When doing a design, I sometimes get a Path Error dialog box
A. GLD Projects are using a number of files to perform design
work. Some of the files are built-in library files and some are
user generated. When working with user generated files, such as an Average
Block Load or Vertical Borehole, GLD creates a relationship that allows
the files to interact
 with each other. Normally, this is not an
issue when all of the files are located in their default locations on
the user computer. In a network environment, there are unknowns
with folder permissions and GLD needs to be able to write temporary
changes to the project and loads files. Many networks are locked
down and will not allow GLD to write to the folders where the user files
are residing. This can occur even when the user has permissions
because their machine operations may not have the right permissions.
A user that is experiencing this type of an issue may see an error
message such
as the one shown here.
The best solution is to copy your load and project files to the folders within GLD that are the default locations. When finished, your files may be copied back to the network for later use. The question below this: ("File Locations") provides a full list of the default locations that GLD uses.
If you can't find your files in these locations in Windows 7, 8 or 10, refer to this note.
If you seem to be unable to run calculations without getting this kind of
error, you may need to set the file and folder permissions in the GLD folder
structure. Please follow steps
here
File Locations
Q. Why can't GLD find my data files?
A. If you have recently updated to GLD2016, your folders and files are residing in a different location than previous versions. Additionally, when you copy old projects to GLD2016, you may have to open and save those projects to reestablish the location of the file to the current settings.
When you create and save a borehole project, average block load, piping project or thermal conductivity test, there is a specific location that GLD expects to see the files. You are free to store your project files to other locations but it will require extra steps to link your projects and loads, etc. For most satisfactory operation, allow GLD to store projects and loads to the default locations. These files can be copied to a network or external project vault when you are finished and ready to move on to a new project. GLD2016 and earlier versions use different locations. Here are where the different versions of GLD expect to find files:
PROGRAM FILES: (All versions)
-
\Program Files (x86)\Gaia Geothermal\GLD20xx (remove
(x86) for Windows XP or 32b OS)
USER GENERATED FILES: (GLD2016)
C:\Users\(User)\Documents\GLDesign
Vertical Projects (.gld) : \work files
Horizontal Projects (.gld) : \work files
Pond Projects (.gld) : \work files
Average Block Loads (.zon): \zone
Zone Files (.zon): \zone
Loads Files (.csv, .xls): \Loads (Hourly and Monthly data subfolders)
Loads (.gt?): \Loads\GT Files
Customer Logos: \Logos
Piping Projects (.gfd, AND .xml): \Piping
Piping System Builder (.gpd): \Piping\Builder
TC Test Project (.gtc): \Thermal Conductivity
TC Test Data (.csv): \Thermal Conductivity\Thermal Conductivity Data Files
TC Test Reports (.pdf or .html): \Thermal Conductivity\Thermal Conductivity Report Data Files
Finance Data (.fin): \Finance
Finance Reports for ASHRAE (.csv) \Finance\Finance Data
ASHRAE Simulation files for Monthly (.txt): \Monthly Data
ASHRAE Simulation files for Hourly (.txt): \Hourly Data
USER GENERATED FILES: (GLD2014 and Earlier)
C:\Program Files(x86) for 64b OS or C:\Program Files for 32b OS
Vertical Projects (.gld) : \work files
Horizontal Projects (.gld) : \work files
Pond Projects (.gld) : \work files
Average Block Loads (.zon): \zone
Zone Files (.zon): \zone
Loads Files (.csv, .xls): \Loads (Hourly and Monthly data subfolders)
Loads (.gt?): \Loads\GT Files
Piping Projects (.gfd, AND .xml): \Piping
TC Test Project (.gtc): \Thermal Conductivity
TC Test Data (.csv): \Thermal Conductivity\Thermal Conductivity Data Files
TC Test Reports (.pdf or .html): \Thermal Conductivity\Thermal Conductivity Report Data Files
Finance Data (.fin): \Finance
Finance Reports for ASHRAE (.csv) \Finance\Finance Data
ASHRAE Simulation files for Monthly (.txt): \Monthly Data
ASHRAE Simulation files for Hourly (.txt): \Hourly Data
LIBRARY FILES: (GLD2016)
C:\ProgramData Note: may be a hidden folder on some systems
Documentation: \Documentation
Heat Pump Library: \pumps
Help Files: \HelpFiles
LIBRARY FILES: (GLD2014 and Earlier)
C:\Program Files(x86) for 64b OS or C:\Program Files for 32b OS
Documentation: \Documentation
Heat Pump Library: \pumps
Help Files: \HelpFiles
Customer Logos: \Logos
If you can't find your files in these locations in Windows 7 and newer, refer to the note above.
Saving your working files to a location other than the GLD default will
cause difficulty in sharing files with co-workers. Some of the project
and zone files generated by GLD contain references to connected files which
are relative to where the user has saved them. When you give one of
these files to another user, the saved relative links do not exist on the
other computer and the files must be regenerated to correct the problem.
By saving files to the default locations, it is possible to share with
others since their GLD installation will look in the correct location, by
default.
ASHRAE Files from the GSA Module
Q. I want to use the ASHRAE files that are generated by the GSA Module. Where can I find them and what is the format?
A. Beginning with a midterm release of GLD2012, the GSA module
now creates ASHRAE outputs in *.csv file formats that work with Excel or
other text editors. The program currently does not include a
button to take you directly to the files, so you can use Windows
Explorer to retreive the files. The standard location is:
GLD2016:
C:\Users\(User)\Documents\GLDesign\Finance\Finance Data
GLD2014 and GLD2012:
C:\Program Files (x86)\Gaia Geothermal\GLD2014\Finance\Finance Data
(Note): If you are using XP or a 32b version of Windows 7 or Vista, please remove the (x86) from the above path.
The files are automatically generated as a CSV file with each press of the calculate button and will be named: FinGeoData_MM-DD-YYYY_HH_MM_SS.csv. The latest files are always from the last time that calculation was performed in the GSA module and if alternate scenarios were included in your project model, there will be an "alt" in the file name for each alternate non-geo solution.
CFD Module Installations
Q. The Piping/CFD Module Won't Open (GLD2010 and GLD2012 only)
A. This module uses a programming interface that is not used in the other GLD modules. While everything else seems to work properly, the piping module will not function unless the file below is properly installed and registered. This is an easy fix. In the GLD20xx --> Extras Folder, manually run the PropertyWindow83_00_setup.exe file. After running, your system should now properly communicate with the GLD20xx CFD module. This applies to GLD 2010 / GLD2012 Premier editions.
Grayed out variables
Q. Can I change variables that appear grayed out in GLD?
A. If values appear gray in your program it means that you either don't have these features available in your version or your program is running in
"trial" mode. If you are running in "trial" mode and you haven't purchased the software,
click here. If you have already purchased the software and you are running in
"trial" mode, please check to ensure that your USB key is properly connected to your computer.
You can verify that your key is connected by looking to see if your USB key is illuminated.
If illuminated, you can check the HASP manager at:
http://localhost:1947
. A browser window will open and present the HASP Administrator,
which will tell you if the workstation is correctly seeing the HASP key.
Grayed out results
Q. What do the grayed out numbers in the results mean?
A. The grayed out numbers in the results come from running the full dominant load against the less significant design. i.e. if there is a design that has a cooling dominant load, then the cooling design will be bolded in the results. The numbers that appear grayed out will satisfy the heating demand but the long term ground effects and ewts will be run as if you applied the full cooling load to the smaller, heat demand satisfying, field parameters.
Iteration errors
Q. What does it mean when a error box appears that
contains:
"calculations fail" and "Iterations=xxx"?
A. This error generally appears when a design will never
stabilize due to the design of the field.
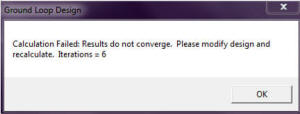 When the program detects that it will not reach a solution based on the
design parameters that have been input, it will give a message such as
this. The number of iterations shown is not significant except
that a very low number of iterations indicates that it did not take GLD
long to see that the design would not work. The first variable that
should be evaluated is the pipe/borehole spacing. If borings are
located in too close of proximity to each other this error will develop
readily. This warning is set up to let designers know that the
particular design is risky and may not work.
Vista issues
Q. How do I get GLD to work with Vista?
A. GLD will work properly with Windows Vista by adjusting some simple settings. Find the location where you installed GLD and look for the file labeled GLDesign.exe. Right click on that file and select properties off of the pop-up menu that will appear. In properties select the "run as administrator" option. Once that option is selected GLD should run properly in Windows Vista.
EWT's and total capacity appear as negative values
Q. Why am I getting negative values for results in fields other than the ground temperature change?
A. This error is extremely rare and has only been
observed in the pond loop module. If you experience this error in
the vertical or horizontal module please let us know. To correct
this problem simply reselect your heat pump and recalculate the results.
This should correct any issues related to these findings
GLD2014 and later have incorporated "Performance Bracketing" messages that should
indicate if your design has exceeded the operating specifications of the
selected heat pump. If you are seeing the message on the loads
module or on the vertical/horizontal design modules, then your results
are not valid until your design parameters are reset to a range that is
within the manufacture's specified temperature limits for the heat pump.
GLD will interpolate the pump curves but cannot extrapolate data beyond
the design specs.
.GT2, .GT3, .GT4 Files
Q. Can GLD use these files or only .GT1 files from Trane Trace?
A. GLD Only uses GT1 files. To make your .GTx files work simply change the number to 1 at the end of the file.
APS File Export
Q. How can I export an APS file to my IES software?
A. GLD (Premier Version Only) can and import, an APS file into the Average Block Loads Module. The file will contain hourly loads profile data that GLD will extract into the Average Block Loads Module. You should place the APS file in the Loads folder in the Hourly Sub-Folder. The APS file may be quite large as it contains a lot of information that is not needed by GLD. After importing the APS file into GLD, the hourly data check box in the Average Block Loads Module will be checked.
To export the APS file from GLD requires that the borehole simulation to be calculated in the hourly mode for at least 1 hour. The APS Export option in the File --> Export pulldown menu will be greyed out if the simulation has not been calculated as described above. The resulting exportable file will contain data regarding different temperatures that IES needs in order to use the GLD calculations. The information that is unrelated to the loopfield simulation will be stripped out of the APS file and the resulting export will always be smaller than the original APS import.
GLD can also generate an exportable APS file if an hourly loads profile is imported into the Average Block Loads module via a CSV file. The export will contain only simulation temperature data that is usable by IES<VE> and the same conditions apply as starting with an APS file.
Note: Due to changes in the file structure used by IES, APS exports from versions of GLD prior to GLD2016 will no longer work. This is effective for users of IES<VE> builds that are dated in early 2017. This is a chage required by IES<VE>, not GLD. Previous versions of GLD will NOT be updated to accomodate this change,
IDF File Export (G-Function Data)
Q. How can I export G-Function information for my design?
A. GLD uses G-Functions to simulate a design when doing a vertical borefield design in the Monthly and Hourly calculation mode. The G-Function is specific to the theory used for monthly and hourly calculations and is not available in Design Day mode, as Design Day uses a different theory that does not use G-Functions.
To export the IDF file from GLD requires that the borehole simulation to be calculated in the Monthly or Hourly mode. The loads must be coming from the Average Block Load Module and the input must contain monthly or hourly data. After calculations are completed, the export option will become available at: File--> Export File--> Export IDF The file exported will be named Gfunct.idf by default and may be renamed for future identification. This file contains the equations that are needed for any program that uses this information such as Trane Trace.
Note: The Zone Manager Loads Module cannot produce a G-Function file because it uses Design Day calculations exclusively.
LOAD Data Requirements
Q. We Have Manual-J Load Data For Our Designs. Can GLD Use This?
A. We typically get this question from Residential deisgners
and occasionally from small Commercial designers. Most of the
time, these are users that are primarily conventional HVAC designers.
The short answer is NO.
Manual J provides peak loads only and is intended for use with
conventional HVAC system design. To properly simulate and solve a
geothermal system design scenario, cumulative load data is also required.
Preferably monthly or hourly loads data for accurate simulations.
Geothermal designs need to balance the total energy necessary, in and out of
the ground, to match the building and equipment loads with the ground heat
exchanger. This is NOT the same exercise that is used to provide a minimum
equipment capacity sizing of equipment for a conventional design.
An analogy might be like knowing the power required to run a motor but
have no idea how often or how long it runs. You can’t size a power source
without both pieces of information unless you have unlimited power
available. Conventional systems essentially have unlimited utility power
and don’t worry about the cumulative energy. Geothermal HVAC is a balancing
act and must have both pieces of information because you are matching the
energy exchange, not just peaks.
In short, Manual-J data is NOT intended for geothermal designs and is NOT adequate to simulate a properly designed ground heat exchanger. There are good tools for providing loads data for geothermal design, including but not limited to: Trane Trace, Carrier HAP, IES and numerous others.
Simulation of Large Loopfields
Q. I'm trying to simulate a large loopfield and I can't tell if GLD is working. Do I need to do something differently?
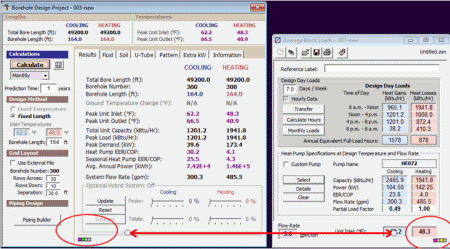
A. Normally, GLD displays a blinking color square in both the
loads and projects module that indicates if your modules are linked and
also shows activity. This display works well for loopfields up to
a few hundred boreholes when working in the Design Day or Monthly modes.
As the loopfields get larger, GLD is being asked to perform so many
calculations that the indicators can appear to be doing nothing because
it requires that sets of calculations be completed prior to changing the
indicator color.
As an example, if you perform an Hourly simulation, you are warned that
the calculations will take a long time for ANY size loopfield because you
are now multiplying already complex operations by another x8760 times for
each interactive data point. Users that try to run an hourly
simulation for multiple years may need to wait for several hours for a
simulation to complete. Unfortunately, this is normal and requires a
high end processor to improve your performance.
Another example is where the design calls for thousands of boreholes. A loopfield that has 3,000 to 4,000 boreholes doing a Monthly simulation may take 40 minutes to one hour to complete. Since each borehole has to interact with neighboring boreholes, the sheer number of calculations is staggering for each datapoint and then is repeated for each year and requires trillions of operations to complete the simulation. During this time, GLD may not look like it is doing anything but if you check the task manager, you will see that the CPU will be consumed by 20 to 50% depending on the system memory and CPU capabilities.
As a rule of thumb, the designer should make an effort to run a short
simulation that gives a result that is "in the ballpark" in terms of desired
results and save the long simulations (ie: hourly or 20 years) as one of the
later steps to fully simulate the conditions.
Regional Temperature Swings in Horizontal Models
Q. My local government or weather agency does not keep Regional Temperature Swing data and I can't find my location in your table. I don't know how to proceed. Can I compute this data?
A. We understand that you may have to do some approximations to determine Regional Air Temperature Swing or Regional Soil Surface Temperature Swing.
In a Horizontal design, this data is important since the local
temperature swings will influence the performance of the horizontal heat
exchanger. In the Soil Tab of the Horizontal Design Project Module, you will need to enter (3) values into GLD
(for the Ground Temperature Corrections at Given Depth)
Coldest / Warmest Day of Year:
If your coldest average day of the year is (example: February 1) day 32; and your warmest average day of the year is (example: July 1) day 181;
these are the figures that you need for the coldest and warmest days of the year.
Using the absolute calendar day numbers (1 to 365) allows the program to be used in either the Northern or Southern hemisphere. You should be able to find typical data for your area.
Regional Temperature Swing:
The Regional Air Temperature Swing number generally comes from your regional weather reporting service or a government agency. Since not every designer can obtain
exact data from a local agency, we can suggest an alternate solution.
Here is an example:
Use this example data (formula works for Northern or Southern Hemisphere):
Average monthly air temperature in January: +0.4 Celsius
Average monthly air temperature in July: +23.6 Celsius
Average yearly air temperature all year round: +12.7 Celsius
An acceptable approximation for Regional Temperature Swing can be calculated by using the following equation:
(| Avg annual temp – Avg January temp| + |Avg July temp – Avg annual temp|)/2
In the example:
Absolute value of average annual temp minus average January temp = |12.7 -0.4| = 12.3
Absolute value of average July Temp minus average annual temp = |23.6-12.7| = 10.9
(12.3+10.9)/2 = 11.6 degrees (approximate regional air temperature swing)
Modeling period for horizontal systems
Q. How long should set the modeling period for during a horizontal design?
A. On shallow horizontal installations, it is common to see the modeling period set to one year. This is done because shallow systems are strongly influenced by surface conditions and have a tendency to refresh themselves on an annual basis. With shallow systems the energy you are moving to or from the building won't store the same as vertical systems will. With the lack of storage, increasing the modeling period will only lead to larger install sizes. However, systems that are installed deeper in the soil may need to be evaluated over a certain amount of time. Current theory indicates that it is necessary to install deeper than ~40 feet to eliminate the influence of the surface conditions. GLD takes this into account in the calculations.
Calculation Methods
Q. I get different answers when I use Design Day vs. Monthly vs. Hourly Calculations
A. GLD gives you several methods to simulate a project design.
Your results will be no better than the loads data that is provided to
size the loopfield. Depending on the data and the design module in
use, GLD can use different
methods to arrive at a design.
Design Day: This design method uses peak load values and annual loads (AEFLH) values in conjunction with what is sometimes called the ASHRAE or Bluebook method. It is the fastest way to quickly size a loopfield although in some instances, the minimal loads data used by the model presents limitations. Design Day and annual energy loads may be imported from numerous third party products.
Design Day calculations are available in the Vertical, Horizontal or
Surface Water modules.
Monthly: This design method uses monthly peak and total loads for heating and
cooling and provides a more nuanced and detailed analysis of how the system performs over time. GLD uses what are
known as "g functions" and a variation on the borehole superposition model/LUND method of calculation to calculate
loopfield performance over time. Since this method uses a much more detailed loads profile, it is able to calculate
much more detailed results. Throughout much of the world, this model is the standard. Due to the greater detail in
the loads profile and the use of "g functions", results calculated from this model can vary from those of the Design
Day method. In some instances (but certainly not all) significant loopfield reductions can be achieved using this model
compared to the Design Day model. Imported loads from advanced building energy simulation tools such as the IES Hourly: This design method uses an hour by hour data set from a single year.
Sometimes referred to as the 8760 method, this calculation intensive method requires significant computational
resources and a single simulation for a large system may take hours. GLD at present time limits the simulation
length to three years for this reason. A modified version of the Monthly method is used to predict hourly performance
of the loopfield. 8760 hourly data is gradually becoming recognized as the industry standard simulation technique.
GLD can accept hourly inputs from the IES Q. How do I activate LEAD+? A. When you downloaded GLD2012 Residential (or earlier) from our website, two versions
of LEAD+ came with it. (LEADPlus is optional and available for
sepatate purchase with GLD2014 Residential version.) One file is a "Trial" version and the other
is a full licensed version. To find the full licensed version of LEAD+
simply navigate to: c:\Program Files (x86)\Gaia Geothermal\GLD20xx\LEAD
Create a short cut to the file named LEADPlusSRM. Place that
short cut on your desktop for convenient use. Double click the
short cut you just created and the licensed edition of LEAD+ should
open. Q. Do I need to have special hardware or software to run the LEADPlus
Program? A. If your system hardware meets requirements to run GLD,
LEADPlus hardware requirements have also been met. Additionally,
LEADPlus utilizes MS Excel to provide the functionality to the multiple
sheets of information and Excel must be installed on the system that you will be using
to run the LEADPlus software. While the LEADPlus software will
open without MS Excel installed, the functionality will be limited and
you will be unable to save your results. The LEADPlus software
utilizes a third party macro from "DoneEx" that relies on Excel for its
functionality. When you save data, the "AddIns" pulldown is used
to save your project data in LEADPlus. Without Excel installed on
your system, this functionality will be unavailable. MS Excel
versions 2000 to 2013 are acceptable to operate LEADPlus 2014 and
LEADPlus 2016.
Note that OpenOffice will not support LEADPlus. NOTE:
LEADPlus for 2012 and earlier require MS Excel versions 2000 through 2010.
The choice of 32-bit or 64-bit was made upon installation of Microsoft Office or Excel and the decision is reversable by reinstalling as a 32-bit application. Refer to your Microsoft documentation for additional guidance. For a more technical explanation of Excel 32-bit vs. 64-bit benefits and issues refer to this Microsoft document:
You will also find this Microsoft document helpful: Q. Why must I have Excel installed on my computer?
A. The DoneEx XCell Compiler is an Excel add-in. You can think of the compiled executable as a wrapper for the underlying Excel file. Upon program launch,
LEADPlus will look for a compatible Excel version and, if not found,
LEADPlus may or not launch. If it does launch without Excel
present, the functionality will be limited and calculations cannot be
performed. The DoneEx compiler is specifically written for Excel
and will not run with the OpenOffice suite. Q. I have Manual J Loads Information. How do I use this in GLD?
A. Manual J is a powerful methodology for performing residential peak heat loss/gain calculations
for conventional HVAC systems. Peak heat loss/gain calculations are a necessary but insufficient
data set for designing residential geothermal loopfields. For geothermal designs, an estimate of the duration (or
total energy) loads is also necessary. A conventional HVAC system
essentially has an "unlimited energy supply", wheras a geothermal system
design is attempting to balance the structure to the ground heat
exchanger, which is not an "continuously unlimited energy supply". Duration (or
total energy) loads are an estimate of the total heating and/or cooling requirements for a project over an entire year. Typically, they
are stated in the form of total BTUs, total kWr or annual equivalent full load hours (AEFLH). For residential designs, a designer
MUST estimate the duration loads, preferably through the use of an appropriate energy modeling tool that can perform such an analysis.
Designing a geothermal system without accurate duration loads can
likely result in a poorly sized system that doesn't perform as expected.
Activating LEAD+ Licensed
LEAD+
Installation, Hardware and Software Operation Requirements
Office 365/Office 2013 will NOT work for versions of LEADPlus 2012 and
earlier.
Important Note: The Microsoft Excel (versions 2000 - 2013)
that is installed on your system must be the 32 bit version in order for
the LEADPlus tool to operate properly. The operating system itself
may be either 32 bit or 64 bit.
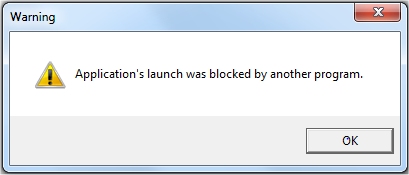
64-bit Workaround. Attempting to run compiled Spreadsheets with a 64-bit installation will display the error message, "Application launch blocked by another program."
http://technet.microsoft.com/en-us/library/ee681792.aspx.
http://officepreview.microsoft.com/en-us/support/choose-the-32-bit-or-64-bit-version-of-office-HA102840825.aspx
Excel Requirements
LEADPlus
for 2012 and earlier require MS Excel versions 2000 through 2010.
Office 365 / Office 2013
will NOT work for versions of LEADPlus 2012 and earlier.
Loads Information for GLD Residential
LEAD Plus or some other loads tool will provide the necessary data
to correctly quantify the peak and total energy. Manual J, by itself,
is NOT enough to model a Geothermal design.


